Snap 2.1 using the pen
star
star
star
star
star
Last updated almost 6 years ago
6 Nsɛmmisa
1

1
1
1
1
1
Open Snap and save a new project as 2.1 using the pen.

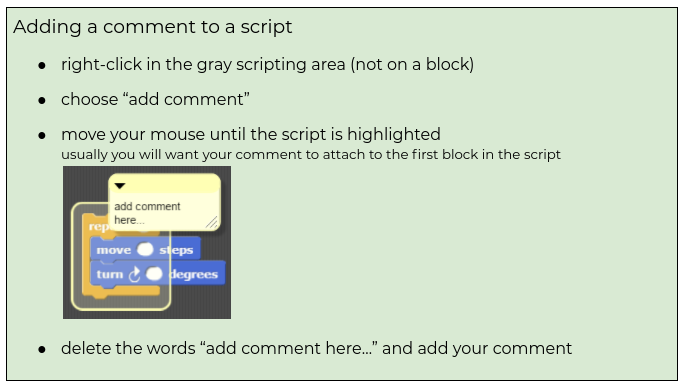
In each section below, complete the steps shown in the images and answer the questions that follow.
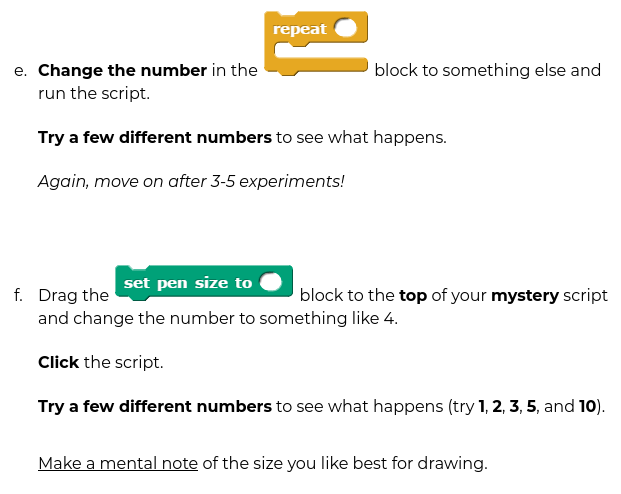
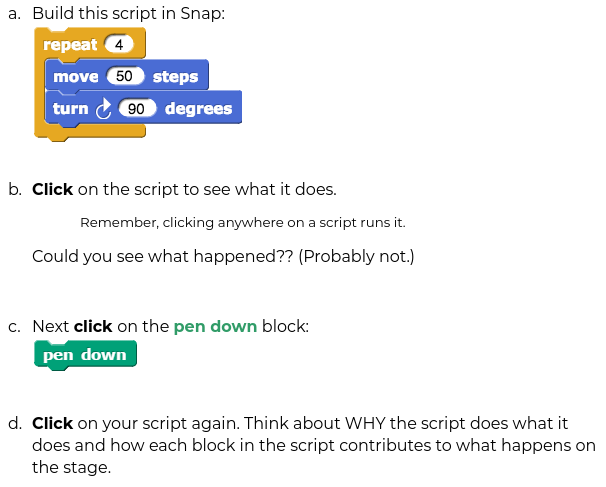
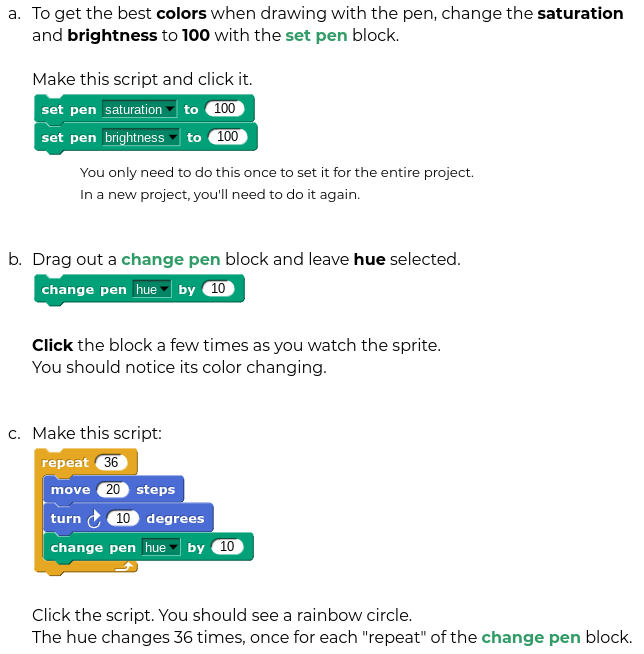
Experiment with drawing with the pen as shown in the steps below.
📼 Here is an ANIMATION of the process.
What does the script do?
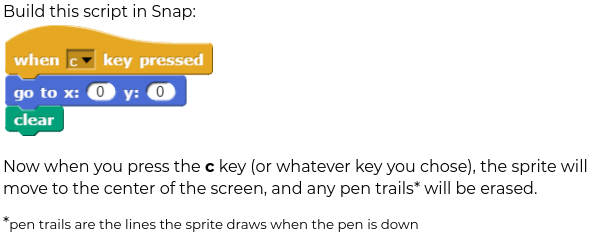
Build a script that you can use to clear the screen with the click of a key.
📼 Here is an ANIMATION of this process.
Why is it important to put the GO TO block first, before the CLEAR block?
What does "hue" mean?
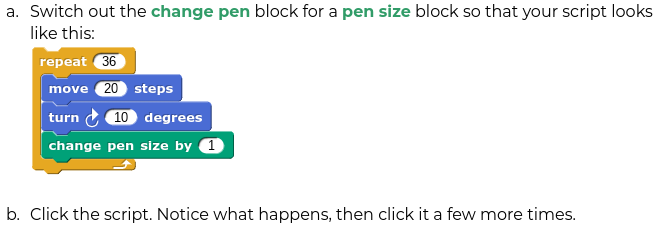
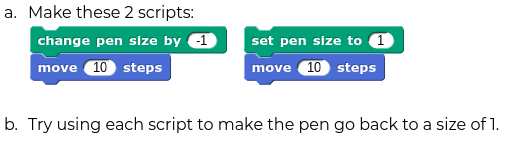
Which block is the most efficient to change / reset the pen size back to 1?
What is the difference between SET blocks and CHANGE blocks?
For some reason, these blocks are tiny. Click on a block to zoom in.
| Draggable item | arrow_right_alt | Corresponding Item |
|---|---|---|
| arrow_right_alt | makes the pen size grow by 1 each time it is clicked |
| arrow_right_alt | makes the pen size equal to 1 no matter how many times it is clicked |
| arrow_right_alt | makes the pen a certain color (a sort of orange) |
| arrow_right_alt | changes the pen color each time it is clicked |
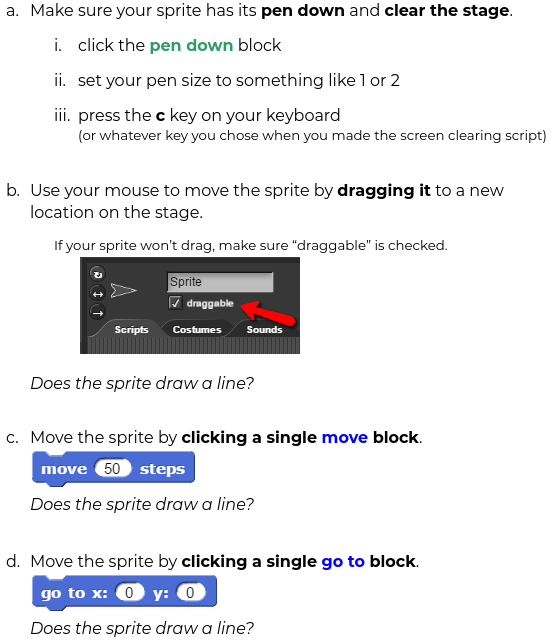
If the pen is down, when will the sprite draw a line? Choose all correct answers.
📼 Here is an ANIMATION of this process.
Now use what you know about the pen to make a cool design of your own.
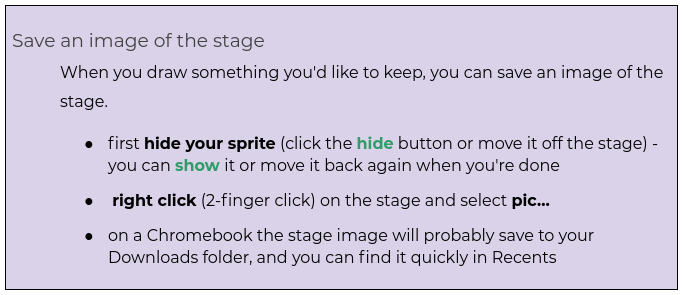
Follow the steps below to save a picture of the stage, then turn in the image in Canvas.