Twa kɔ nsɛm atitiriw so
Log in
Sign up for FREE
arrow_back
Laabri

🔰 SketchUp for Schools #02: 3D Printing Guide (Intro)

star
star
star
star
star
Last updated over 4 years ago
10 Nsɛmmisa
Hyɛ no nsow a efi ɔkyerɛwfo no hɔ:

This activity is inspired by the SketchUp for Schools Curriculum lesson of the same name.

"A complete guide to 3D printing in SketchUp for Schools."

This activity is inspired by the SketchUp for Schools Curriculum lesson of the same name.

10
10
2
8
2
2
2
2
2

Lesson Description

A complete guide to 3D printing in SketchUp for Schools.

Instructions

  1. Watch the video below and respond to the related items.

  2. Consider exploring this supplementary slide deck as well: SketchUp for Schools 3D Printing Guide

Asemmisa {{asɛmmisaAhyɛnsode}}
1.

Place the 5 easy steps from the video in chronological order.

  1. Resize & export

  2. Print

  3. Make sure that your model is watertight

  4. Create a model

  5. Export & slice

Asemmisa {{asɛmmisaAhyɛnsode}}
2.

Even though most of our models will not need to be submerged in water, the term watertight is used to describe one important characteristic of 3D models that are suited for printing. What does it mean for your SketchUp model to be watertight?

Asemmisa {{asɛmmisaAhyɛnsode}}
3.

What file type will you use when exporting models from SketchUp for 3D printing?

Asemmisa {{asɛmmisaAhyɛnsode}}
4.

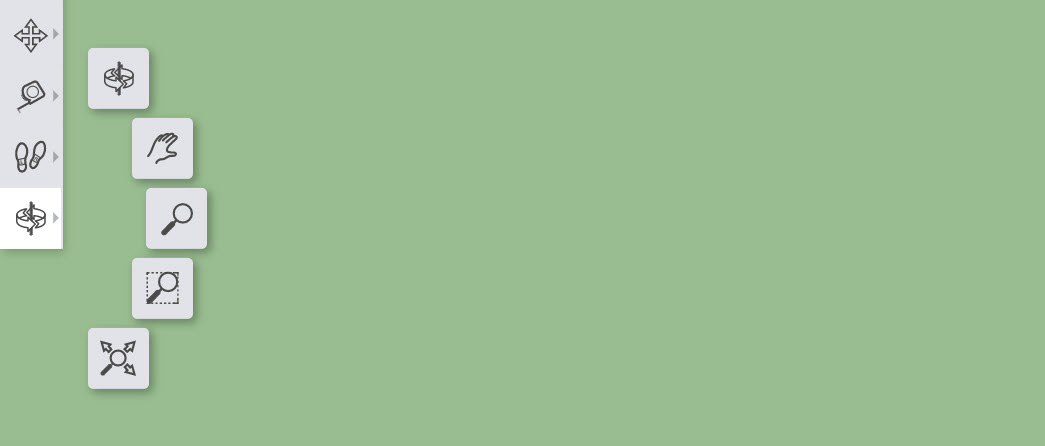
The Toolbar: Match each icon from the toolbar with the tool that it represents. You may need to zoom out to see all of the items. You can also place each item from the left column by selecting it (click it) then selecting (clicking on) the match for it in the right column.

Draggable itemarrow_right_altCorresponding Item

arrow_right_alt

Select

arrow_right_alt

Erase

arrow_right_alt

Paint Bucket

arrow_right_alt

Move Objects

arrow_right_alt

Draw Shapes

arrow_right_alt

Measure Tools

arrow_right_alt

Camera Controls

arrow_right_alt

Draw Lines

Asemmisa {{asɛmmisaAhyɛnsode}}
5.

Camera Controls: Identify the icon that represents the Orbit tool in the image below.

Asemmisa {{asɛmmisaAhyɛnsode}}
6.

Camera Controls: Identify the icon that represents the Zoom tool in the image below.

Asemmisa {{asɛmmisaAhyɛnsode}}
7.

Camera Controls: Identify the icon that represents the Pan tool in the image below.

Asemmisa {{asɛmmisaAhyɛnsode}}
8.
Asemmisa {{asɛmmisaAhyɛnsode}}
9.

True or False: You will need to click Save near the top left to save your project. It is recommended that you save often so you don't lose the progress you've made.

10
Asemmisa {{asɛmmisaAhyɛnsode}}
10.

🧠 Retrieval Practice:

Summarize the content of this lesson. What topics, ideas, tools, and vocabulary were introduced?