This course includes resources provided by the following:
Joe Olayvar & Evelyn Lindberg in association with the Washington State Library
Carnegie Mellon Robotics Academy from Carnegie Mellon University
📕 Click here to access the LEGO Mindstorms EV3 Programming Basics document in its entirety.
▶️ Click here to access the entire LEGO Mindstorms EV3 YouTube playlist from the Washington State Library.
🎓 Click here to access the free online EV3 course from Carnegie Mellon University.

Place the steps of the "Basic Programming Workflow Model" in the correct sequence.
Modify Program
Rinse and Repeat steps 2 thru 4 as necessary
Experience the eternal question: "Why isn't it working?"
Create Program
Test/Run the Program
From the EV3 program's Lobby, where could you open the Programming Page with only one click?

Where is the Menu located?

Where is the Palette located?
Categorize the items based on the area of the programming page that they describe.
The "Help" dropdown and the "Show EV3 Help" option can be accessed here.
By default, a Flow Block Start Button is placed here.
Brick information is displayed here.
This is the programming area.
Green Action blocks can be accessed here and dragged to the canvas.
This area has a very similar feel and function to a Microsoft Menu Bar.
Canvas area controls are found here.
The Download center can be found here.
Orange Flow Control blocks can be accessed here and dragged to the canvas.
Connectable Programming "Blocks" are located here.
Canvas
Palette
Hardware Page
Toolbar
Menu
Where is the Hardware Page located?
Categorize each programming block based on its type.
Action
Flow Control
Projects may contain program(s) within them.
Where is the New Program button located?
The LEGO Mindstorms User Guide contains a lot of valuable information.
A user guide can be accessed from the EV3 software via the menu.
Where is the Toolbar located?
Where is the Canvas located?
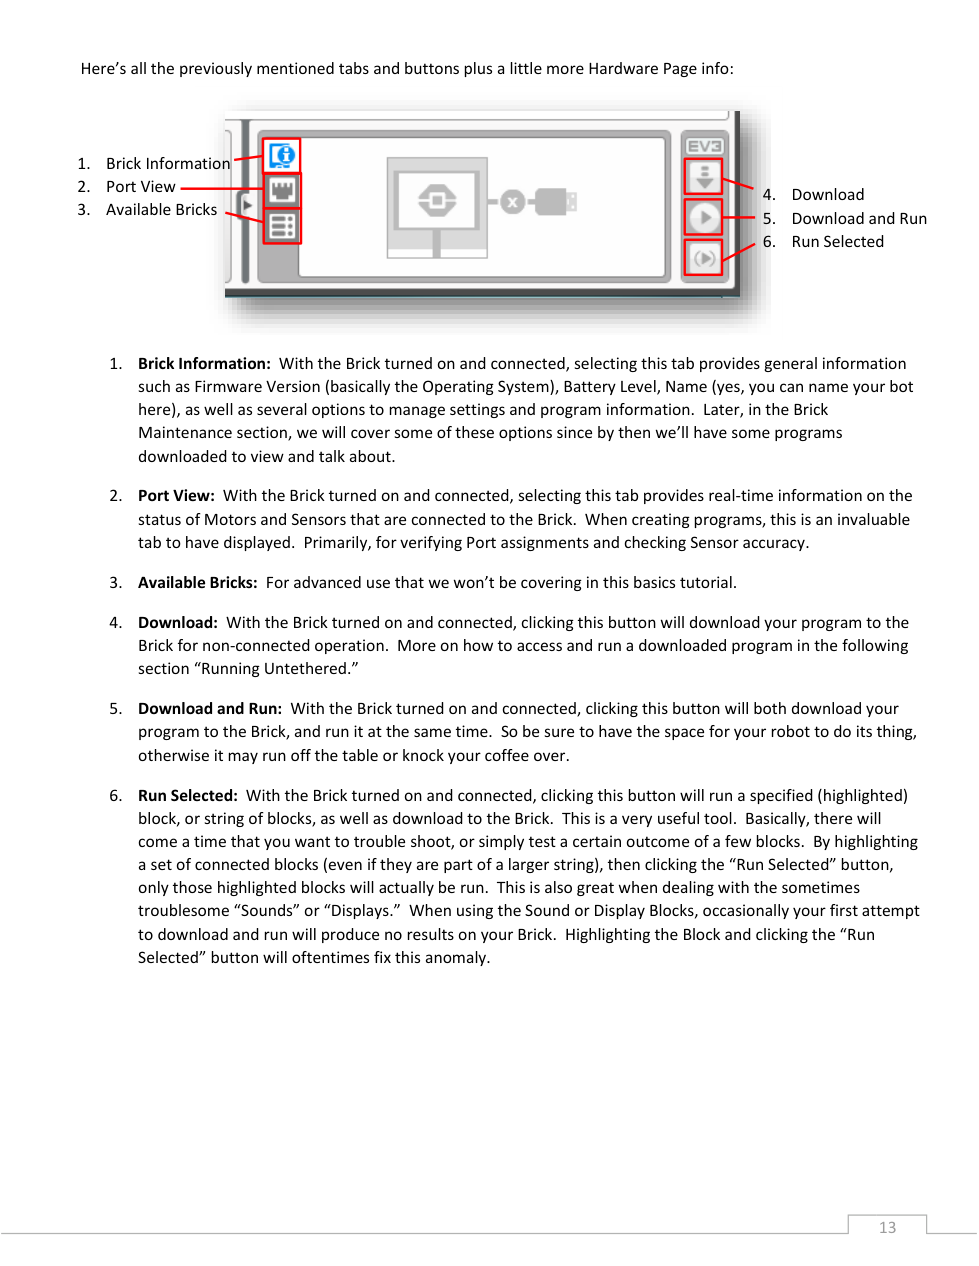
Which icon on the Hardware Page provides access to Run Selected?

Which icon on the Hardware Page provides access to Download and Run?
Which icon on the Hardware Page provides access to Brick Information?
What does it mean for an EV3 to run untethered?
Which icon on the Hardware Page provides access to Port View?
Categorize each item based on the Hardware Page tab it describes.
Not covered in this lesson.
Downloads programs to the brick for non-connected operation.
Provides real-time information regarding connected motor and sensor status.
When creating programs, this tab provides invaluable information!
Runs a specific selected block, or string of blocks to test out certain parts of a program.
Provides general information: battery level, EV3 name, etc.
Downloads programs to the brick and immediately runs them.
Brick Information
Port View
Available Bricks
Download
Download and Run
Run Selected
Which icon on the Hardware Page provides access to Available Bricks?
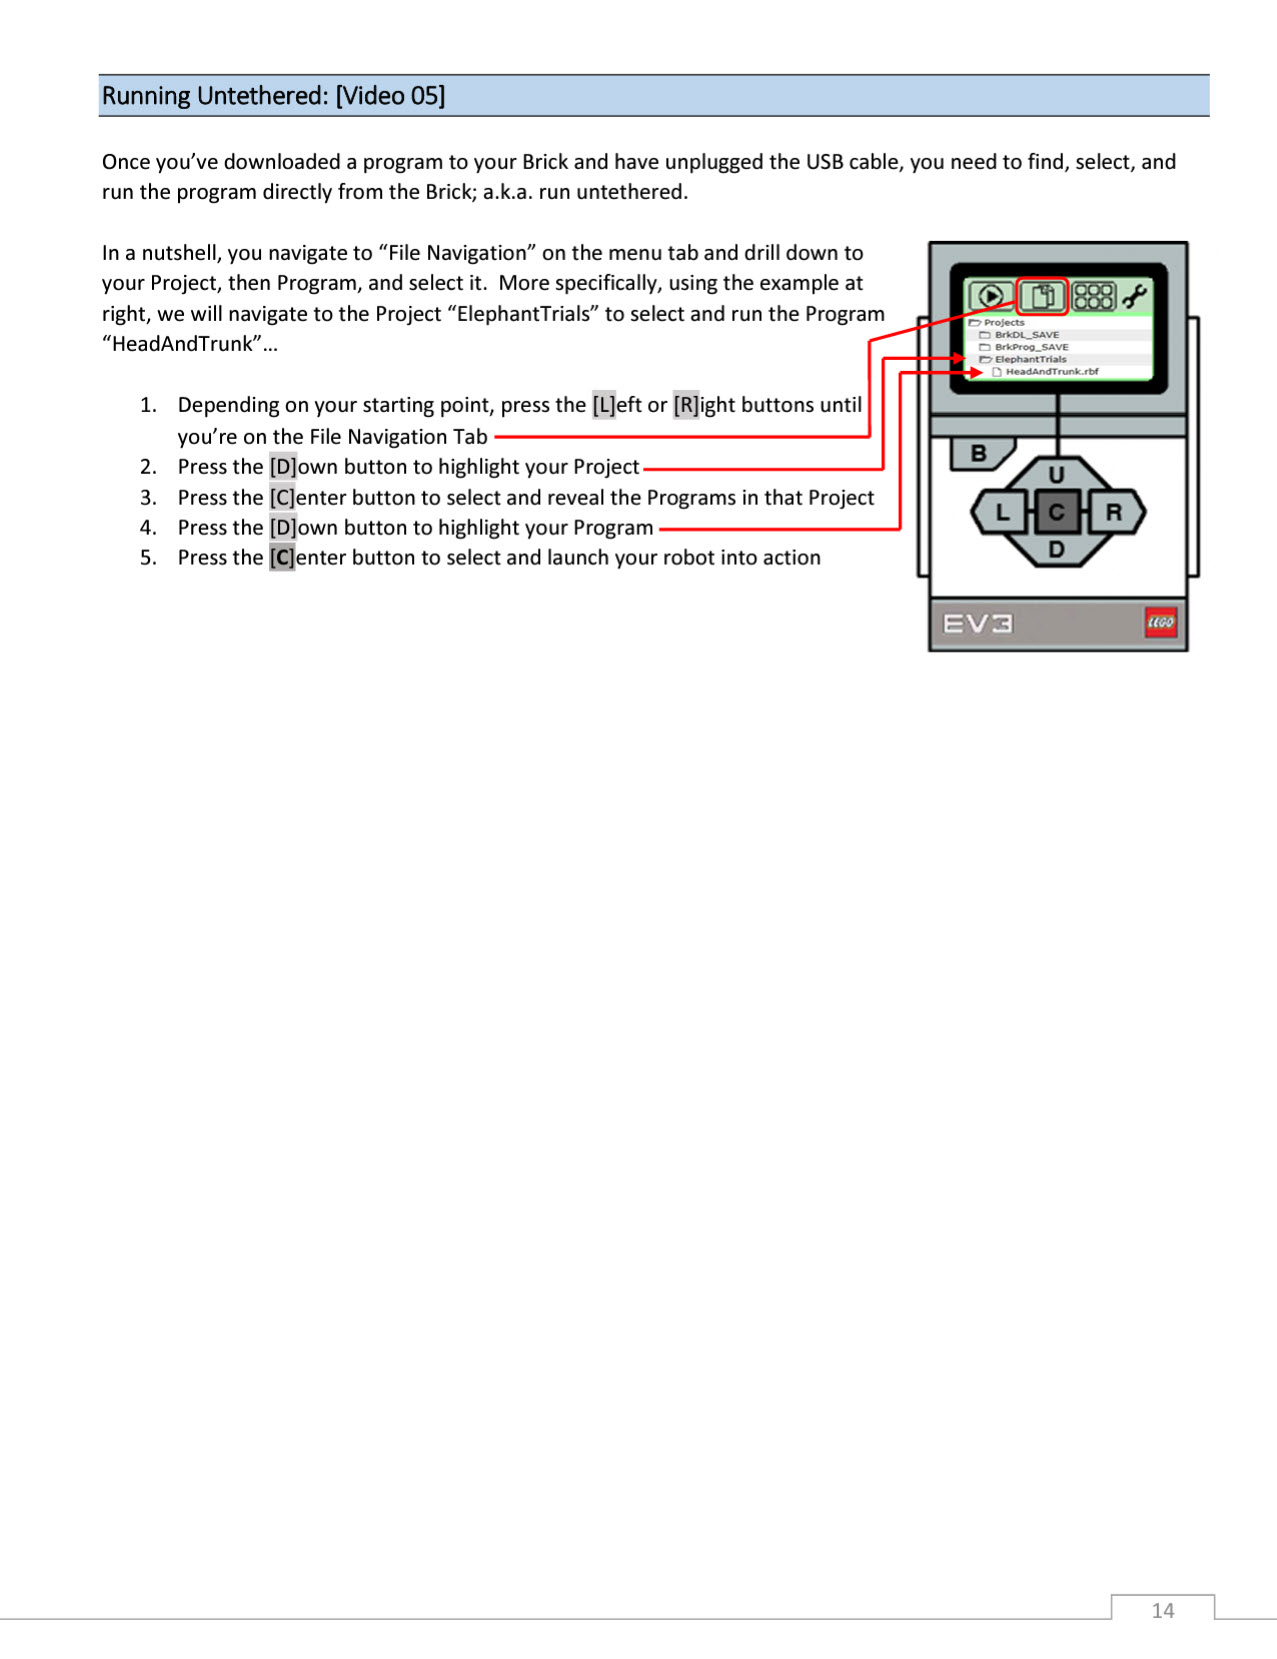
Place the steps for running a program while the brick is untethered in the correct sequence.
Press [C] to select and launch your robot into action.
Use [L] or [R] to navigate to the File Navigation tab.
Press [D] to highlight your project.
Press [C] to select your project and reveal the programs in that project.
Press [D] to highlight your program.
Which icon on the Hardware Page provides access to Download?
🧠 Retrieval Practice:
Summarize the content of this lesson. What topics, ideas, and vocabulary were introduced?